(TBench) 3.3 Add the SRAM model to the Project |

|

|
|
(TBench) 3.3 Add the SRAM model to the Project |
|
|
(TBench) 3.3 Add the SRAM model to the Project |
|
|
|
(TBench) 3.3 Add the SRAM model to the Project |
|
|
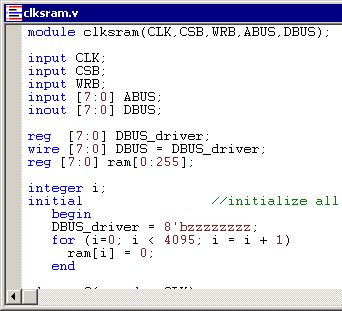
Next we will add the model under test (MUT) files to the project. TestBencher can parse the MUT files and extract the signal and port information for use in the transaction diagrams. Also, TestBencher uses the MUT information to instantiate the top-level component into the testbench model. For this tutorial we are going to test a clocked SRAM model.
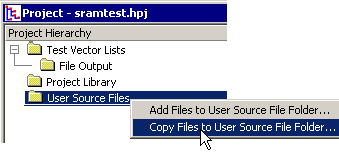
•Right-click the User Source Files folder in the Project window and select Copy Files to User Source File Folder from the context menu option. This will open the Add Files... dialog. |
|
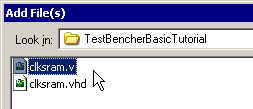
•Use the Look in box to browse to the SynaptiCAD > Examples > TutorialFiles > TestBencherBasicTutorial directory. |
•Depending on your language type, select either the Verilog clksram.v or the VHDL clksram.vhd file. |
|
•Press the Open button to close the dialog and add the file to the project. |
|
•Double click on the clksram MUT file to open the file in an editor window. Glance through the code so that you have an of how the model we will be testing works. Close the editor when you are done. |