(Sim) 1.7 Simulate in Auto Run Mode |

|

|
|
(Sim) 1.7 Simulate in Auto Run Mode |
|
|
(Sim) 1.7 Simulate in Auto Run Mode |
|
|
|
(Sim) 1.7 Simulate in Auto Run Mode |
|
|
In this section, you will build and simulate the MUT with the graphical testbench. Then you will experiment with the Debug Run and Auto Run simulation modes.
Build and Simulate the Project:
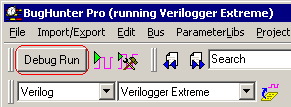
•Press the yellow Build button on the simulation bar. |
|
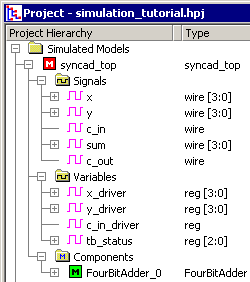
•Notice that after the build is complete, a new model called syncad_top was added to the Simulated Models tree. This is the top-level instance for the project and it hooks up the graphical test bench signals to the model under test (FourBitAdder). Double clicking on syncad_top will let you view the generated test bench code. •Also notice that all of the signals and variables of syncad_top have been added to the Stimulus and Results diagram (like in section 1.3). •For this tutorial we are concerned with the outputs of the MUT, so you can ignore all of the signals except the sum and c_out signals. •The driver and status signals are used by our TestBencher Pro product to control the execution of multi-diagram testbenches. These are not used in the tutorial. |
|
•Press the large green Run button to simulate the entire test bench. |
|
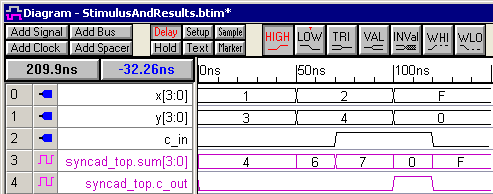
•Verify that Sum and c_out equals x + y + c_in. The schematic is shown in section 1.2. In the diagram below we dragged and dropped the sum and c_out signals to the top of the simulated signals to make a smaller picture. |
Debug Run versus Auto Run Simulation Modes:
•Currently the simulator should be in Debug Run mode, so that simulations are only compiled when the Build button is pushed. |
|
•Drag and drop an edge on c_in and notice that the simulated waveforms do not change. To update the waveforms, press the Build button, followed by the Run button to update the simulation output. |
|
•Press the Debug Run mode button to toggle the mode to Auto Run. |
|
•Drag and drop the same edge on c_in and now notice that the simulated waveforms change each time an input is changed. In Auto Run mode, simulations are performed each time a waveform is moved (the Build and Run actions are automatically performed). However, if the simulator is paused in the middle of a simulation when the waveform is changed, then you must manually restart the simulation to apply the change. This keeps minor mouse clicks from prematurely exiting a debug session. •Experiment with dragging edges and changing the values of the virtual states. If this was a low-level module that you just designed, then you could quickly check the functionality of the module without having to design a formal test bench. If you are running VeriLogger Extreme, you need to wait between changes for the simulator to compile and finish the previous simulation. |