Project-level array variables can be initialized with data from a file during the test bench build process. The data is read from the file during the test bench generation (not at simulation time) and written in the code of the top level test bench. This technique is very useful for Verilog test benches, because the Verilog code generation does not support file input during simulation (like the technique in Section 6.8 Input Data Dynamically from a File (VHDL)).
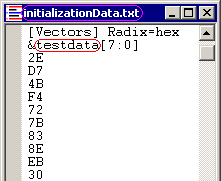
Set the Size to be the number of elements to read from the file, and set MSB and Data Type to match the data in the file.
•
At the bottom of the dialog, check the Initialize Structure with File box, then use the browse button to find the data file that you created.
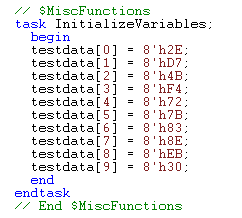
3) Generate the Test Bench and investigate the code generation:
•
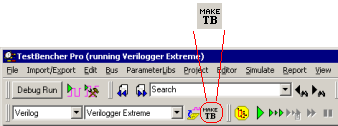
Press the Generate Test Bench button on the simulation button bar. This collapses then expands the macros in the template file.
•
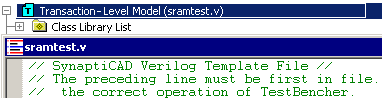
Double-click on the Component Model folder in the Project window to open the template file.
•
Search for the variable that you attached to the file. The code generation should look something like the image shown.
4) Reference the Variable inside the Diagram
•
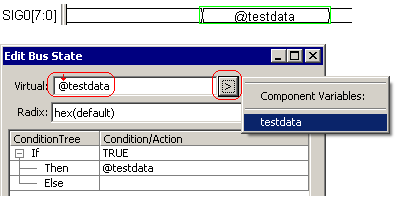
Double click on a waveform segment to open the Edit Bus State dialog.
•
Use the > button to find the file variable or type it into the Virtual edit box. Make sure to use the @ symbol to indicate that it is a project level variable.
•
Since this is an array, you must add an index to the variable name. It can be a hard-coded index like "4" in @testdata[4] or it can be a variable that can be passed into the diagram each time it is called.
•
To make a variable that is an input to the timing diagram transaction, press the View Variables button on the diagram window and create a variable that has a direction of input. Then use this variable as the index to the array variable.