(TD) 1.3. Add the Clock |

|

|
|
(TD) 1.3. Add the Clock |
|
|
(TD) 1.3. Add the Clock |
|
|
|
(TD) 1.3. Add the Clock |
|
|
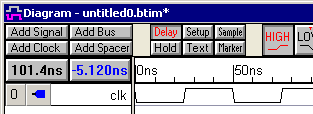
First we will create a clock. Clocks draw themselves based on their parameters, so you will not be able to drag and drop clock edges or make a delay end on a clock edge. For this tutorial, the clock is named clk, has a period of 50ns (20MHz), and starts with a low segment.
Define the Clock Parameters using a dialog:
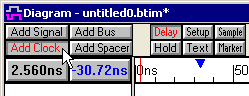
•Press the Add Clock button to open the Edit Clock Parameters dialog. |
|
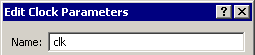
•In the Name box, type clk to set the clock name. |
|
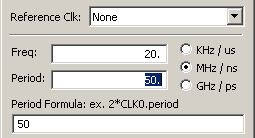
•In the Period box enter 50 and make sure that the MHz/ns button is selected. When you tab out of this box, the Freq box will change to 20 to match the new period value. •Notice that the period can be also be defined by a period formula or in terms of a reference clock. |
|
•Check the Invert (Starts Low) box at the bottom of the dialog. Clocks are normally displayed high at time zero, so "invert" makes the clock start low at time zero. |
|
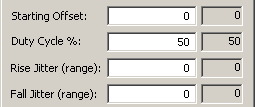
•Notice that the clock can have an offset starting time from time zero. The duty cycle can be set to any percentage value. And edge jitter is uncertainty around the occurrence of the clock edge. |
|
•Notice that buffer delays represent uncertainty after the clock edge (used to model uncertainty from clock tree buffers), and delay correlation determines how closely delays are related to each other. •For more information on correlation and the different types of delays, and clock grids read Chapter 2: Clocks in the on-line help |
|
•Press the OK button to close the dialog. Make sure that the clock looks like the following image. |
|
Reopen the Edit Clock Parameters dialog:
•Double left click on the clock waveform to reopen the Edit clock parameters dialog. Note, if you click too close to a clock edge it opens an edge dialog instead of the parameters dialog. |
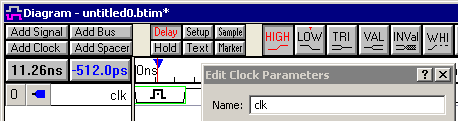
•Press the Ok button to close the dialog. |
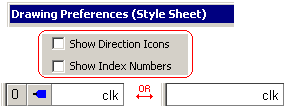
Hide the direction and index columns:
•The direction and index columns are not used in this tutorial so hide them by choosing Options > Drawing Preferences to open the dialog. Then uncheck Show Direction Icons and Show Index Numbers. |
|