(Sim) 1.3 Build the Tree and Investigate the Project |

|

|
|
(Sim) 1.3 Build the Tree and Investigate the Project |
|
|
(Sim) 1.3 Build the Tree and Investigate the Project |
|
|
|
(Sim) 1.3 Build the Tree and Investigate the Project |
|
|
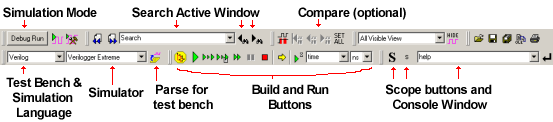
In this section we will build the project tree and use the tree to view the internal modules. Before we begin, take a look at the Simulation Button Bar and familiarize yourself with the buttons. This button bar will control most aspects of the simulation. Slowly pass the mouse over the buttons and read the tool tips.
Three ways to build a project:
•Compile the project by pressing the yellow Build button on the simulation bar, selecting the Simulate > Build menu, or pressing the <F7> key. |
|
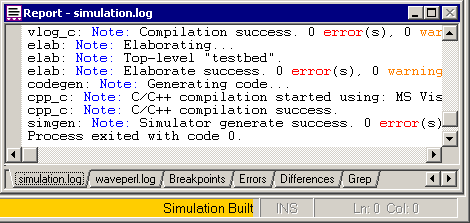
•When the build is successful, a yellow Simulation Built message will display in the lower right hand corner of the program. •The Report window Simulation Log tab shows the build results, and the Error tab would display a hyper-linked list of errors if there were any. |
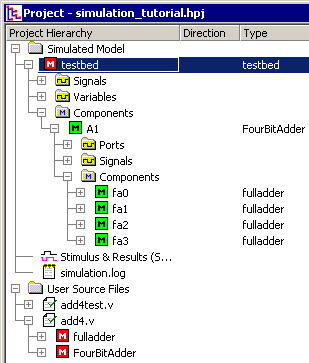
Setting Top-level instances after the first Build:
•By default, BugHunter identified testbed as the only top-level instance, because all other modules are instantiated under it. For this tutorial, this is the desired top level instance. •After the first build, you can optionally right click on other modules and choose Set as a Top Level instance to force instantiation as top level instances. •Notice that the User Source files have green check marks to indicated that they are built. •Double clicking on any component will open a editor scrolled to that place in the code. |
|
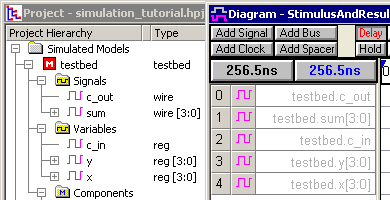
Set Watch Signals after the first build:
•BugHunter by default sets watches on all the signals and variables of the top-level module. This means that the signal names are displayed in the Stimulus and Results diagram and the waveforms will be displayed during simulation. Event history is only maintained for these signals. •The purple waveform icon means the signals are internal to the model and are not ports. |
|
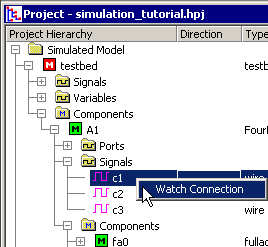
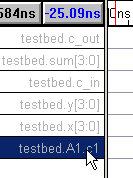
•Open the project tree until you find component A1 and signal C1, then right click and choose the watch menu option. This causes C1 to be added to the Stimulus and Results diagram. •You can also set watches on entire components, blocks or variables using the same technique. |
|
•Remove any extra watch signals that you added in the last step. First left click on the signal name in the diagram window to select it, then press the <delete> key. |
|