Step 4: Add Source Files to the Project |

|

|
|
Step 4: Add Source Files to the Project |
|
|
Step 4: Add Source Files to the Project |
|
|
|
Step 4: Add Source Files to the Project |
|
|
Once the project is created you can create new source files using the built in editors. Then add the source code files to the project so that BugHunter will know the location of the files to compile.
To create a new source file:
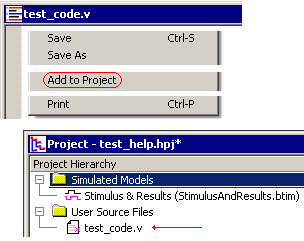
•Choose the Editor > New HDL File menu option to open an editor window. Type in your source code and then save the file. Usually you will save the file in the project directory, but it is not required.The Editor menu contains functions that act on the editor windows and Chapter 4: Editor Functions covers all of the editing features. |
•Next, right-click in the editor window and choose Add to Project. This will add your file to the User Source Files folder in the Project window. |
|
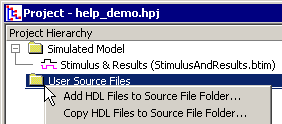
Adding source files to the project when not opened in an editor window:
•Right click on the User Source Files folder and choose one of the Files to Source File Folder menus to open a file dialog. •The Copy menu copies the source file to the project folder and adds it to the project list. |
|
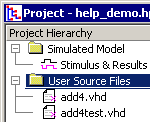
•The Add function adds the file and its path without moving it to the project folder. Files can also be added by choosing the Project > Add User Source File(s) menu from the main bar. |
•When files are first added to the project, you can see the filename, but you cannot see a hierarchical view of the components inside the files. This is shown by the pink X on the node. To view the internal components on the project tree you must first preparse the design by performing a build or run a simulation as described in Step 6: Build the Project. |
|
•Double clicking on a source file name in the Project window automatically launches an editor window. |
Files that should not be added to the User Source Files folder
There are three types of source code files that should not be added to the User Source Files folder: (1) files that will be automatically included by a source code file, (2) files that were added via compiler command line options field in the Project Simulation Properties dialog (see 2.12 Compiling Command-Line Based Designs for details), and (3) files that will be found using the source code library paths.
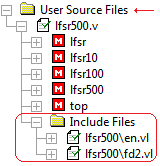
After the simulation has been built, you can see the files that have been automatically included by looking in the Project tree.
•To view files that have been included by a source code file, open the tree under the particular file and look in the Include Files folder. |
|
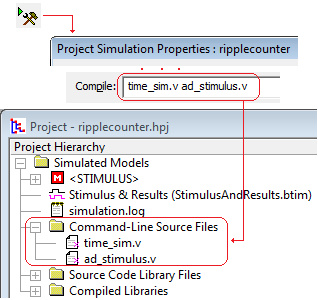
•Files passed to the compiler via the Compile command line options field in the Project Simulation Properties dialog will be displayed in the project tree inside a folder called Command-Line Source Files after the preparse phase. This folder is re-filled based on the options passed in the command line whenever the project is built. This folder will only display when it is not empty and files cannot directly be added or removed from this folder. |
|
•To view files that were found and compiled from source code library path searches during the preparse phase, look in the Source Code Library Files folder. See Section 2.9 Source Code Libraries for more information about setting up paths to source code libraries. In the image shown, the file tb_clock_typ.v was found and parsed. |
|